Exposure Compensation Explained Simply
Light meter reads 0 EV, the viewfinder looks perfect – and yet your photo comes out too bright or too dark? That’s exactly where exposure compensation comes in.
01What Is Exposure Compensation and Why Do You Need It?
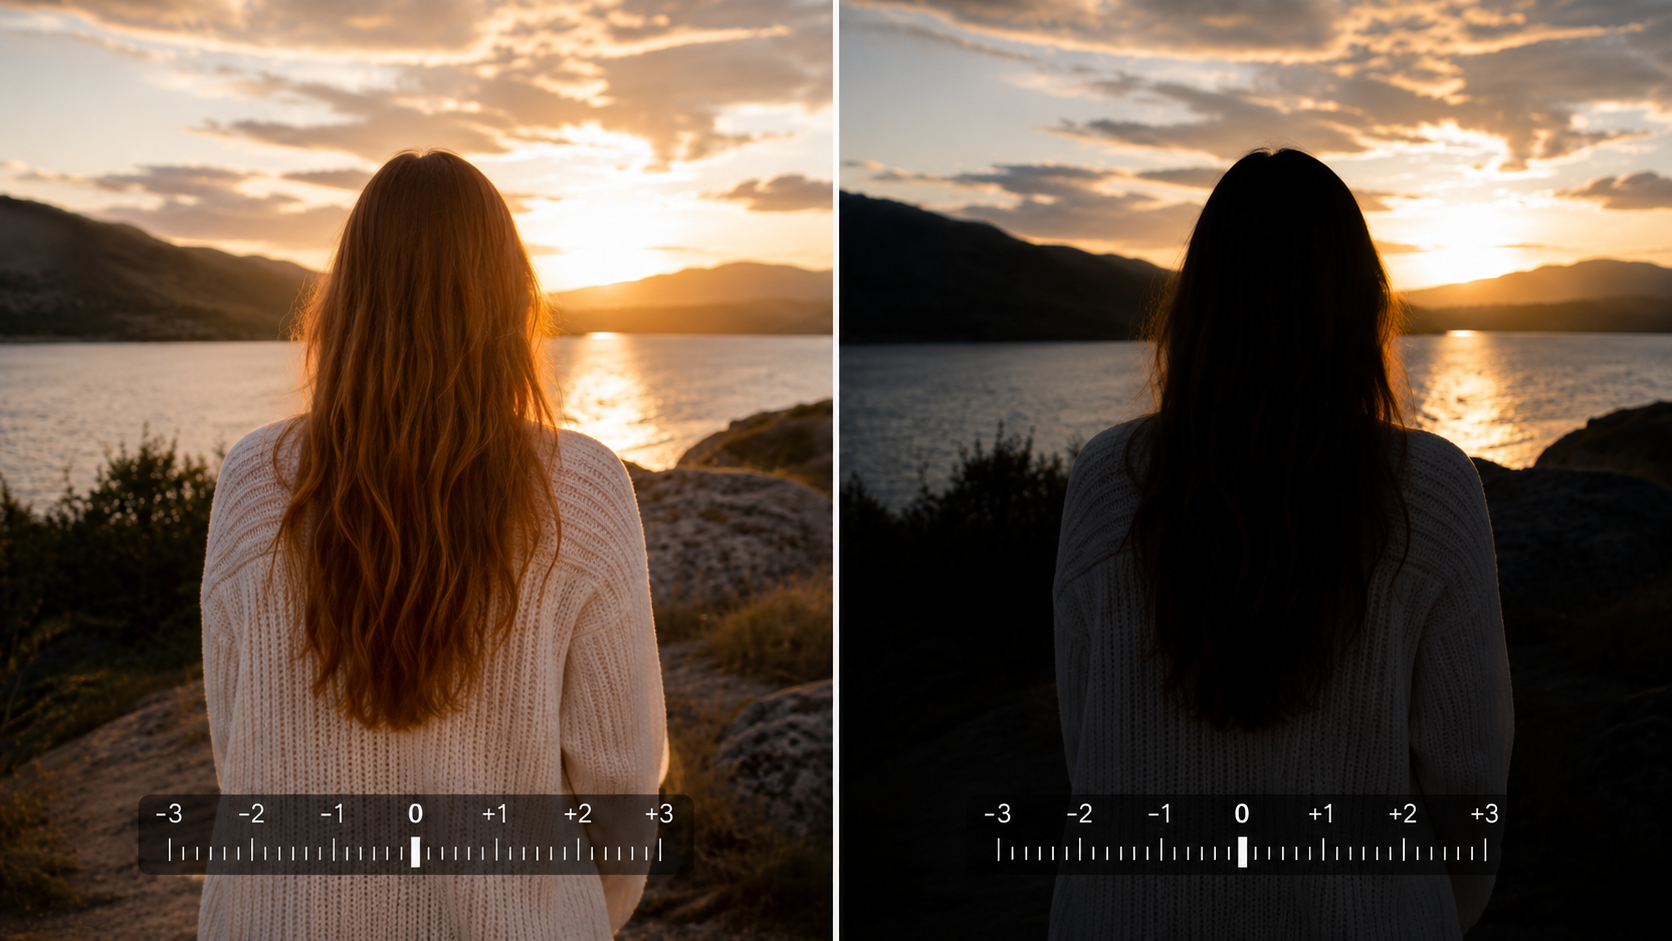
Exposure compensation shifts the exposure value (EV) — the number shown on your camera’s exposure scale — deliberately up or down.
Here’s why that matters: most cameras rely on an automatic metering system that tries to reach an average mid-tone brightness. That works well most of the time — but not always. In scenes that are very bright, high in contrast, or set against snow or backlight, the camera’s metering system can struggle. In these situations it may misjudge the correct exposure, leaving your photo over- or underexposed.
Picture this: you’re photographing a white wall or a snowy field. Your camera essentially thinks, “This is way too bright — I need to pull it down a bit.” So it automatically reduces the exposure to avoid overexposure, and the result is a photo that looks too dark.
At night, the opposite happens. The camera thinks, “This is way too dark — I need to brighten it up.” So it lengthens the shutter speed or raises the ISO, and suddenly your image no longer looks the way you intended — it comes out too bright or unnatural.
Exposure compensation lets you correct for exactly this. It gives you control over the exposure whenever the metering system gets it wrong, so the brightness of your image matches what you actually see.
If you’d like to understand how your camera decides what counts as “correctly exposed” in the first place, check out our article on exposure metering for a full breakdown of the different metering modes.
02How Exposure Compensation Works
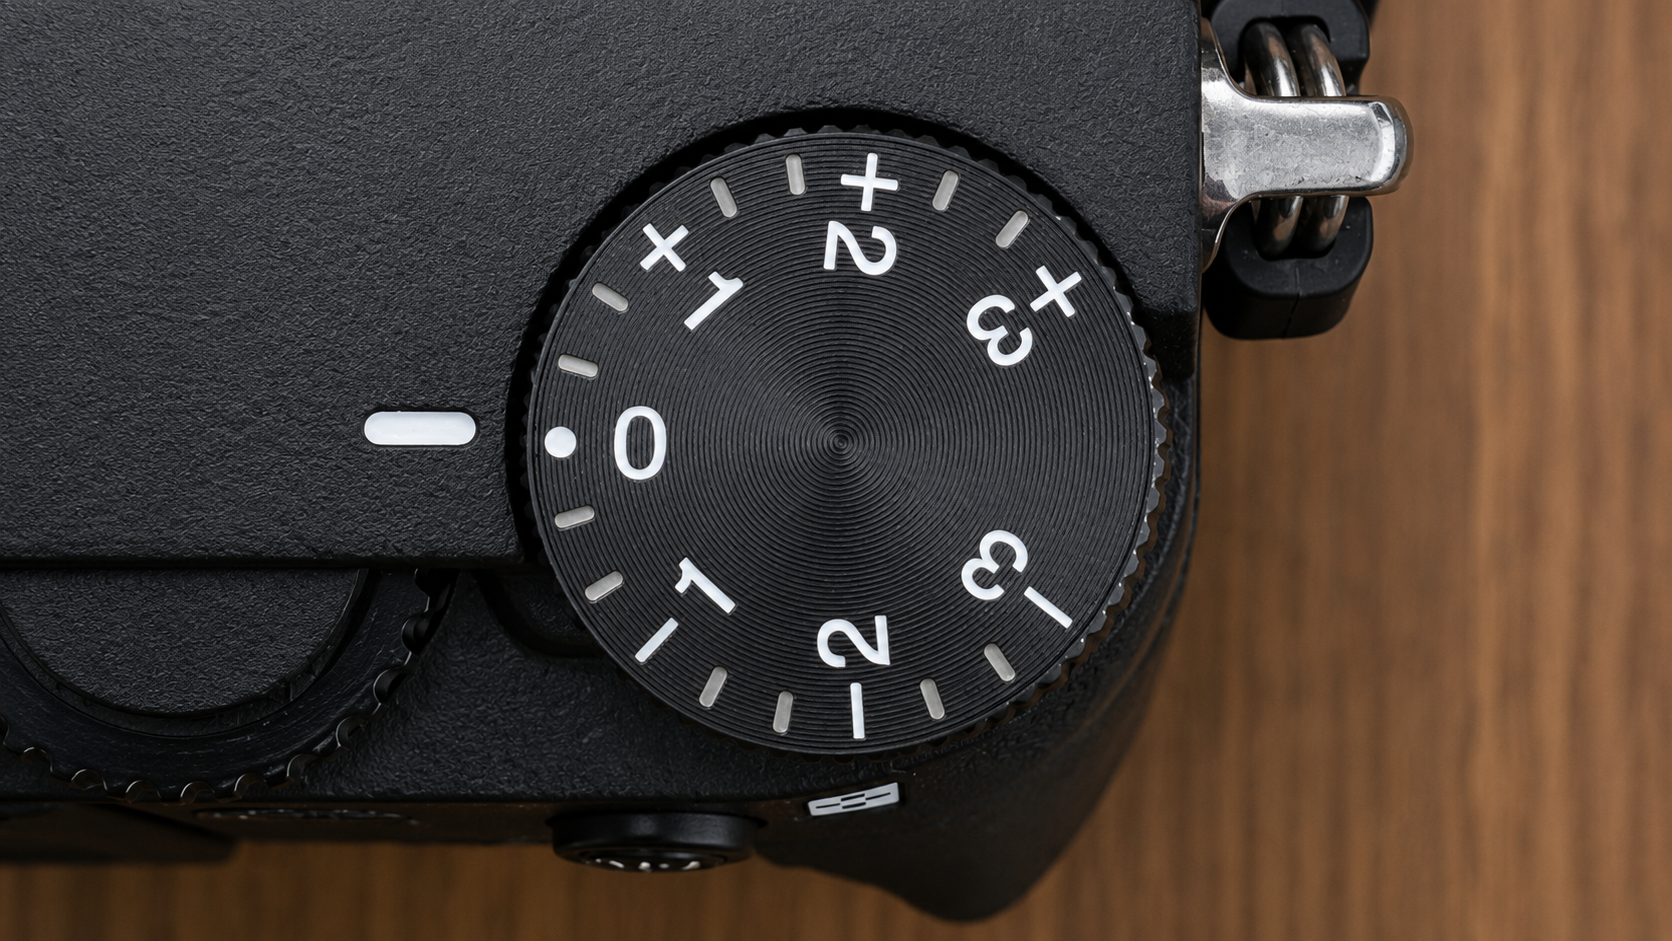
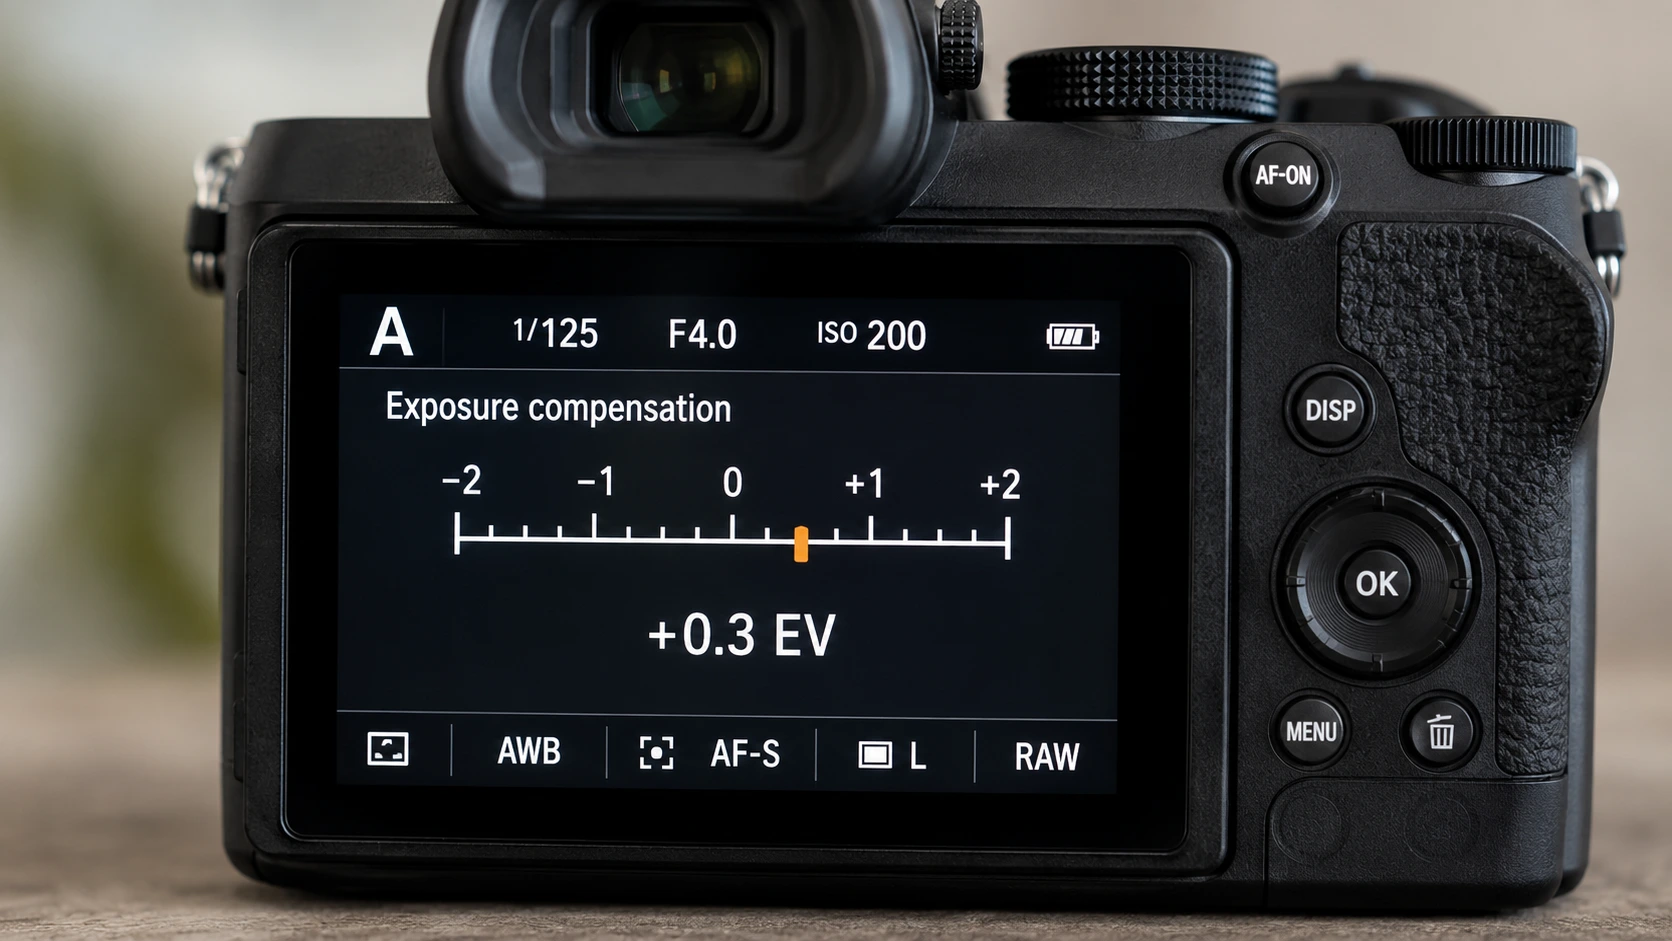
Almost every camera has a dial or button marked with a “+/-” symbol. This is what controls whether your photo turns out brighter or darker. Turn it to the right — say, to +1 EV — and the camera lets in more light, brightening the image. Turn it to the left, to −1 or −2 EV, and less light reaches the sensor, darkening the image.
Quick tip: checking your histogram tells you whether highlights are clipping or still hold detail.
A shift of 1 EV doubles or halves the amount of light. You don’t need to manually rework your entire exposure setup — the camera handles it automatically by adjusting shutter speed, aperture, or ISO. That’s what makes exposure compensation so quick to use without fiddling with every setting by hand.
This is especially useful in changing light, bright backgrounds, or backlit situations. You can react quickly and use exposure compensation to brighten or darken your subject without extensive trial and error.
03Exposure Compensation Across Camera Modes
How exposure compensation behaves depends entirely on which mode you’re shooting in. As we know, the interplay of ISO, aperture, and shutter speed determines how much light reaches the sensor — and therefore how bright or dark your image turns out. This is exactly where exposure compensation steps in: depending on your camera mode, it automatically adjusts one of these three variables to make your image brighter or darker. Let’s take a closer look at each mode and how exposure compensation responds.
04Automatic Modes: P, A/Av and S/Tv
Exposure compensation only works when you’re shooting in an automatic or semi-automatic mode — that means P, A/Av, or S/Tv. It always adjusts whichever value you haven’t set yourself — the part the camera is controlling automatically. Let’s break each mode down:
In this mode you want to control depth of field. So exposure compensation doesn’t touch the aperture — instead, it adjusts the shutter speed to reach the exposure you’ve dialed in.
Here it’s the reverse — you set the shutter speed, and the camera adjusts the aperture.
In this mode, the camera automatically balances the relationship between aperture and shutter speed. When you dial in exposure compensation, it simply shifts that relationship to make the image brighter or darker.
Of course, exposure compensation has its limits. It only works as long as the camera still has room to adjust values like aperture or shutter speed. Once those options are maxed out, it can’t brighten or darken your image any further. In those situations, the only real fix is additional light — a flash, a lamp, or any other light source to brighten your subject deliberately.
In manual mode, you control exactly how light and shadow shape your image. There’s no automation here — you set ISO, aperture, and shutter speed yourself. Your camera’s light meter, visible in the viewfinder, shows how bright it thinks the scene is.
If the indicator sits at −1 EV, the image is slightly underexposed; at +1 EV or beyond, it’s overexposed. You can use this readout as a guide to nail the exposure — or intentionally deviate from it to create a certain mood. The exposure compensation function itself doesn’t do anything here, though, because you’re setting every value yourself. Instead, you make the correction manually by adjusting aperture, shutter speed, or ISO directly. This is exactly how you learn how small adjustments shape the brightness and feel of your images.
05When Is Exposure Compensation Worth Using?
There are plenty of situations where deliberately using exposure compensation gets you better results. In bright scenes — snowy landscapes, or light-colored clothing against a dark background — cameras tend to underexpose. The image ends up looking flat and gray. Dial in +1 or +2 EV in these cases, and your subject will appear clearer and brighter.
Backlit situations also benefit from positive compensation, helping to brighten your subject and reveal detail that would otherwise be lost. On the flip side, in dark environments — candlelight, for instance — cameras tend to overbrighten because the overall scene is so dark. A negative correction of around −1 EV prevents that and preserves the natural mood of the light.
In short, you take active control over whether your photo comes out brighter or darker — and start learning to shape your images with light, a defining skill for any photographer.
06Conclusion — When Exposure Compensation Really Matters
Exposure compensation is one of the fundamentals of photography. It comes into play whenever your camera’s automatic metering gets it wrong — in very bright, very dark, or high-contrast scenes. With it, you can shape light deliberately and turn a technically correct exposure into an image with real impact.
07Practice Makes Perfect
Grab your camera, head outside, and start experimenting with exposure compensation. Watch how your image changes as you dial it brighter or darker — and notice how that shift affects the mood, color, and overall feel of the shot.
You’ll notice that every small adjustment brings you a step closer to truly understanding light — and that’s exactly what turns a photo into an image with feeling and expression.
Frequently Asked Questions About Exposure Compensation
What does EV mean in exposure compensation?
EV stands for Exposure Value. It shows how much brighter (+EV) or darker (-EV) your image becomes compared to the exposure your camera originally metered. A shift of 1 EV doubles or halves the amount of light.
When should I dial in positive exposure compensation?
In very bright scenes like snowy landscapes or backlit shots, cameras tend to underexpose. A correction of +1 to +2 EV produces a clearer, brighter result instead of a dull, gray-looking image.
Does exposure compensation work in manual mode?
No. In manual mode (M) you set aperture, shutter speed, and ISO yourself, so automatic exposure compensation has no effect. Instead, you correct exposure directly by adjusting those values yourself.
Why does snow often look gray in photos?
Your camera assumes an average mid-tone brightness and automatically reduces exposure for very bright subjects like snow to avoid overexposure. A positive exposure compensation setting corrects this.